Import Demo
We also come with an easy to configure and flexible Single Product template. With this feature, you are able to configure which template to be displayed on the Single Product page of your choice.
This feature is only available in the Pro version. Please make sure you have activated the Jeg Elementor Kit Pro plugin and have already activated your Jeg Elementor Kit Pro license.
To begin configuring the Single Product Template, in WP-Admin please navigate to Jeg Elementor Kit → Theme Builder
Then you will be presented with the JKit Theme builder interface. After that, you can go to the menu Templates → Single Product.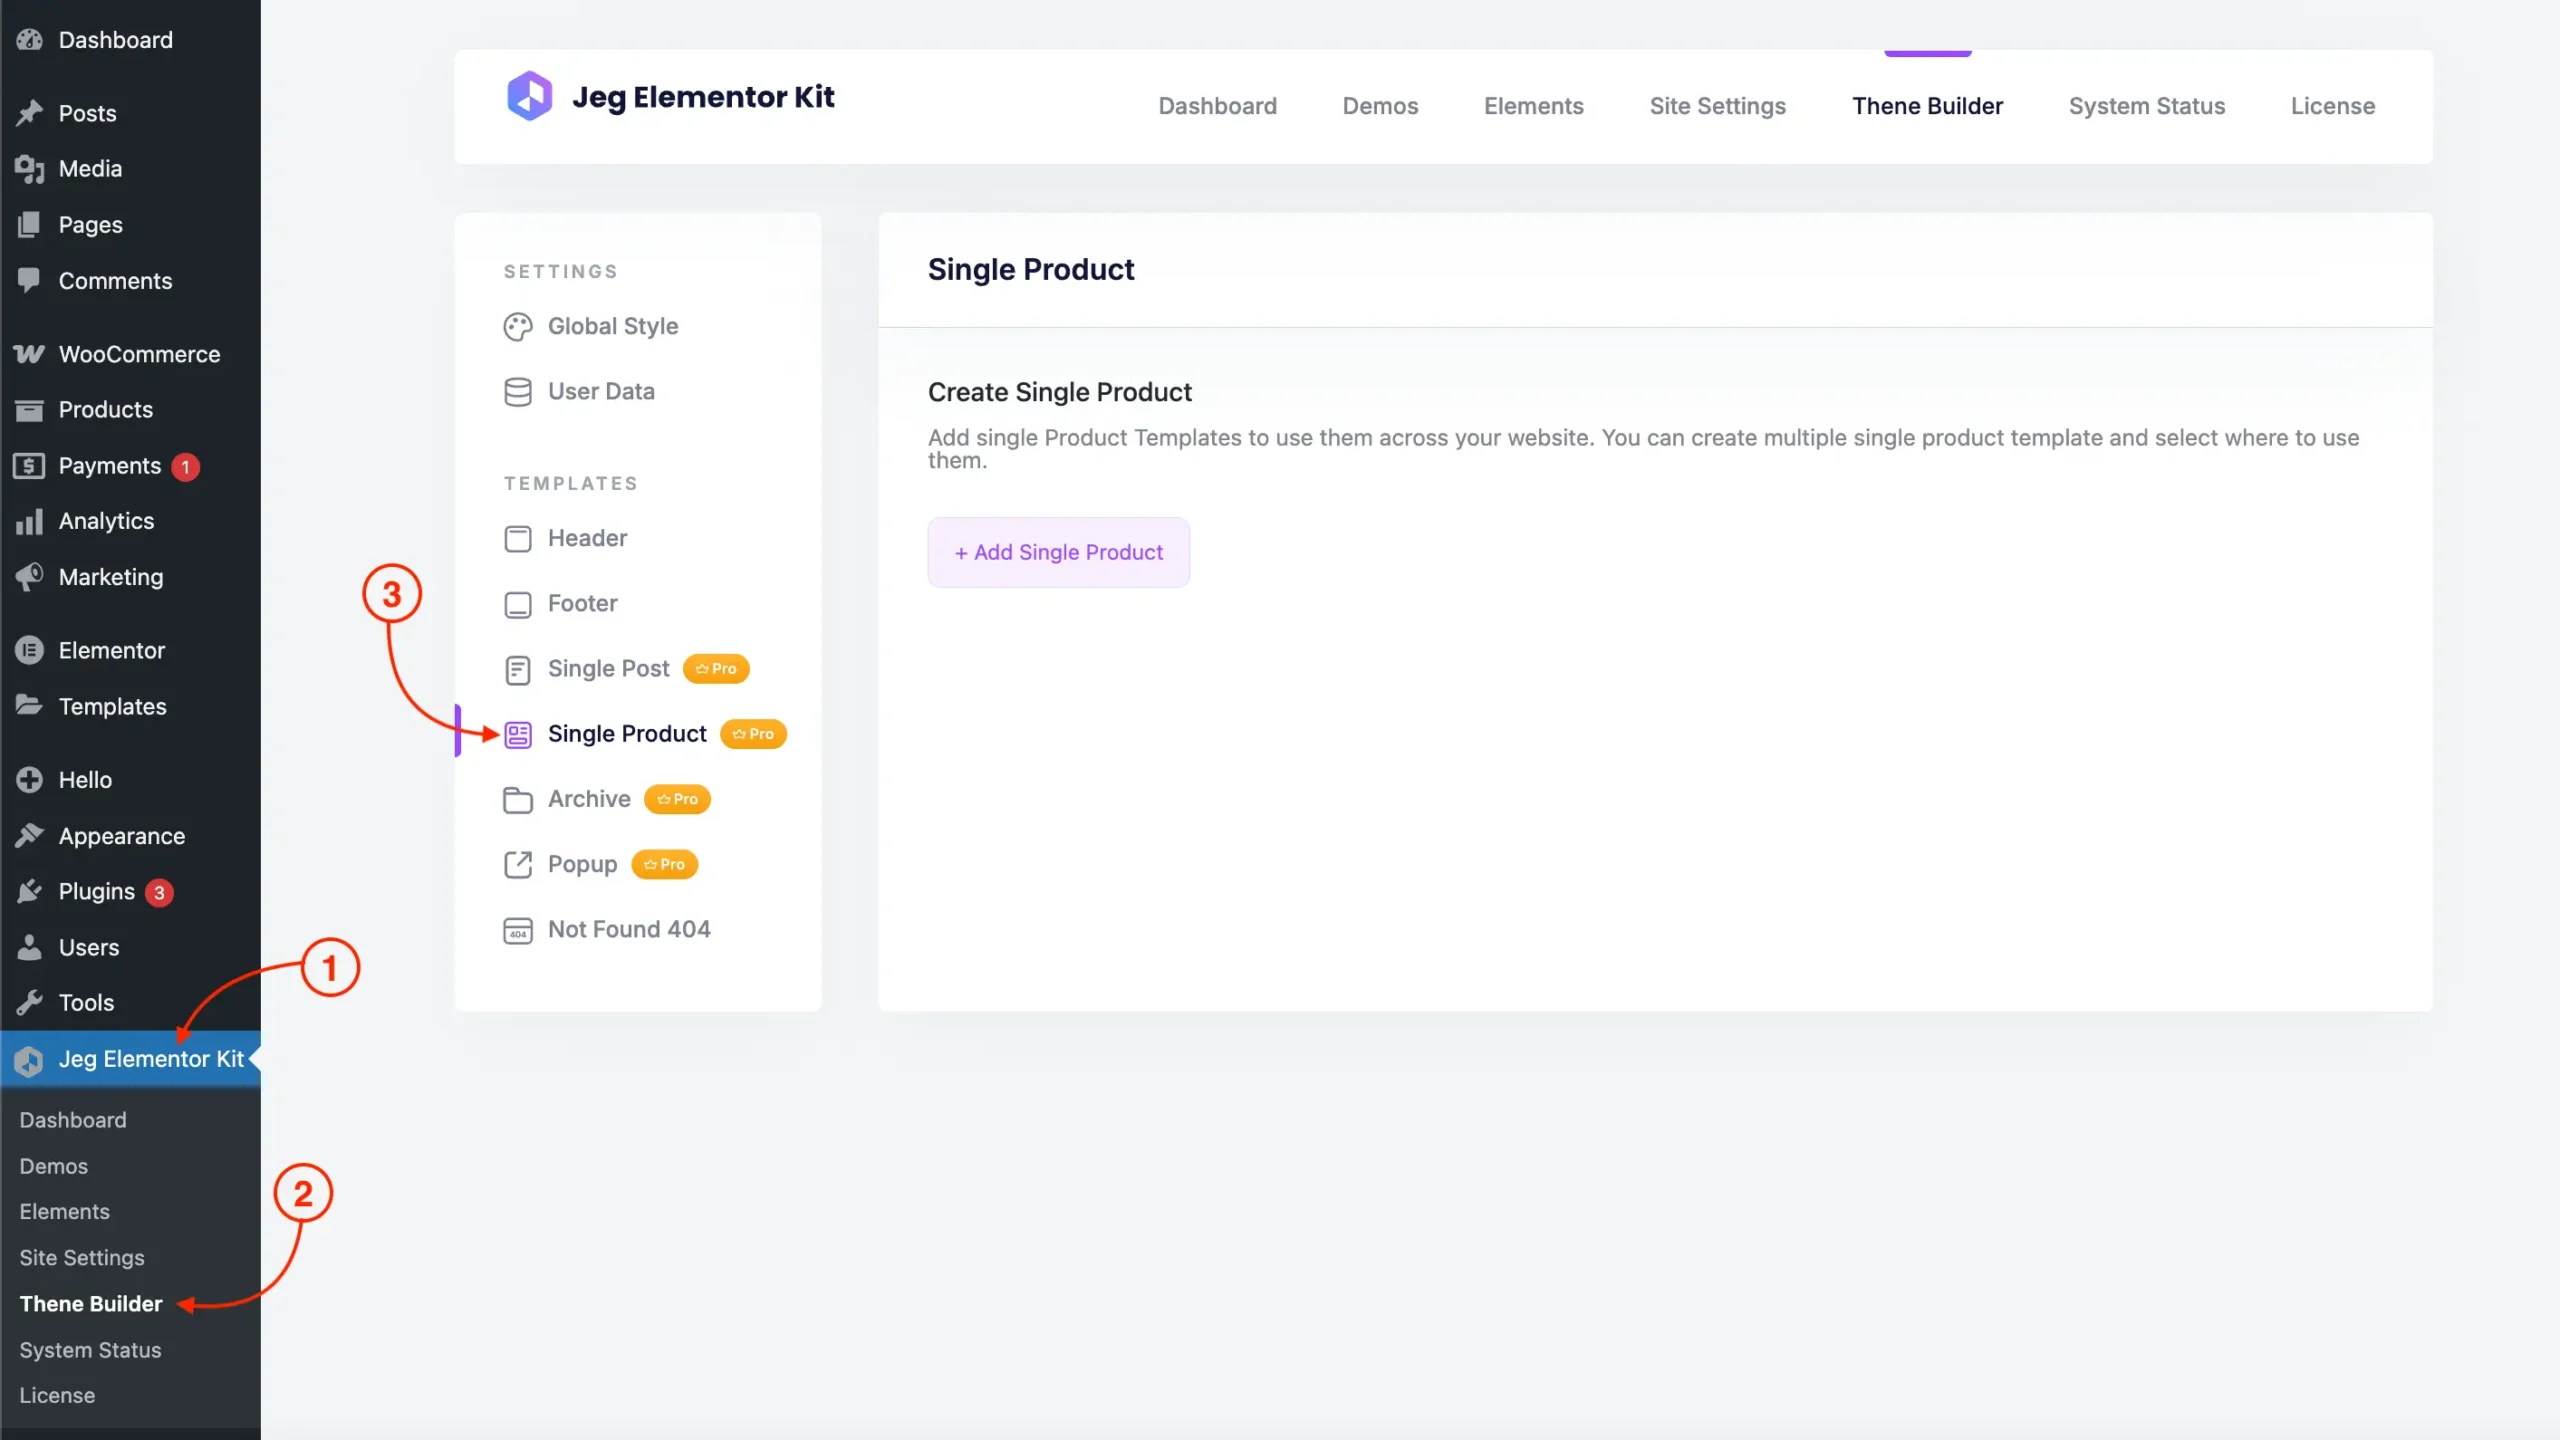
Create New Single Product Template
To start creating a Single Product Template, you can click on the Add Single Template button and you will be greeted by the Create Single Product Template interface where you can name and set up the condition for the current Single Product template.
Once you are satisfied with the Single Product Template configuration, you can finalize your Single Product Template by clicking on the Create Template button.
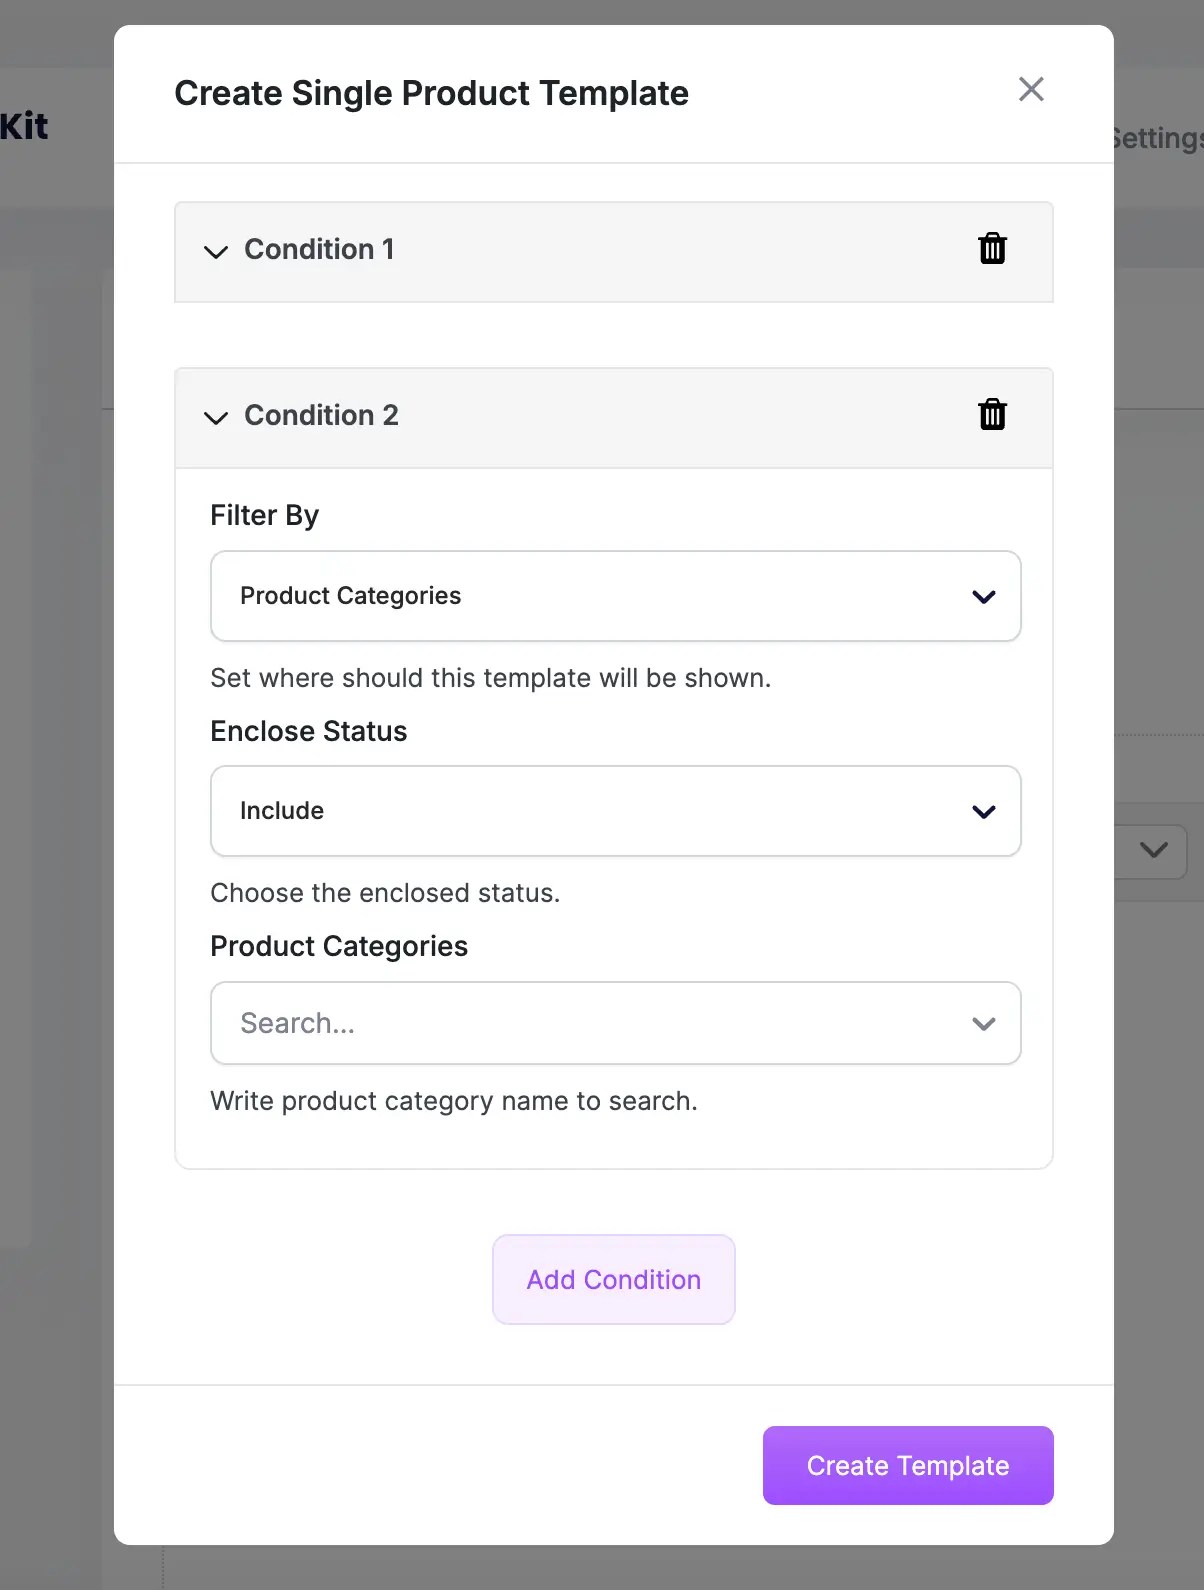
Setup Condition
You can create some conditions where your Single Product Template will be shown, or leave it empty to show it everywhere.
The Single Product Template conditions are evaluated by the AND logic. Since you can create multiple conditions, this means the template would only be rendered if all the conditions are satisfied, otherwise looped to the next Single Product Template.
Once you are satisfied with the Single Product configuration, you can finalize your Single Product template by clicking on the Create Template button.
You can create a new condition by clicking the Add Condition button.
Manage Single Product Template
You can add multiple Single Product Templates. Upon visiting the site, the Single Product Templates will be looped from the highest priority (top) to the lowest priority (bottom).
The Single Product Template of the next priority will only be looped if the conditions of the previous Single Product templates are not satisfied.
If the current Single Product loop conditions are satisfied, that Single Product template would be rendered on the site otherwise, it will loop to the next Single Product Template.
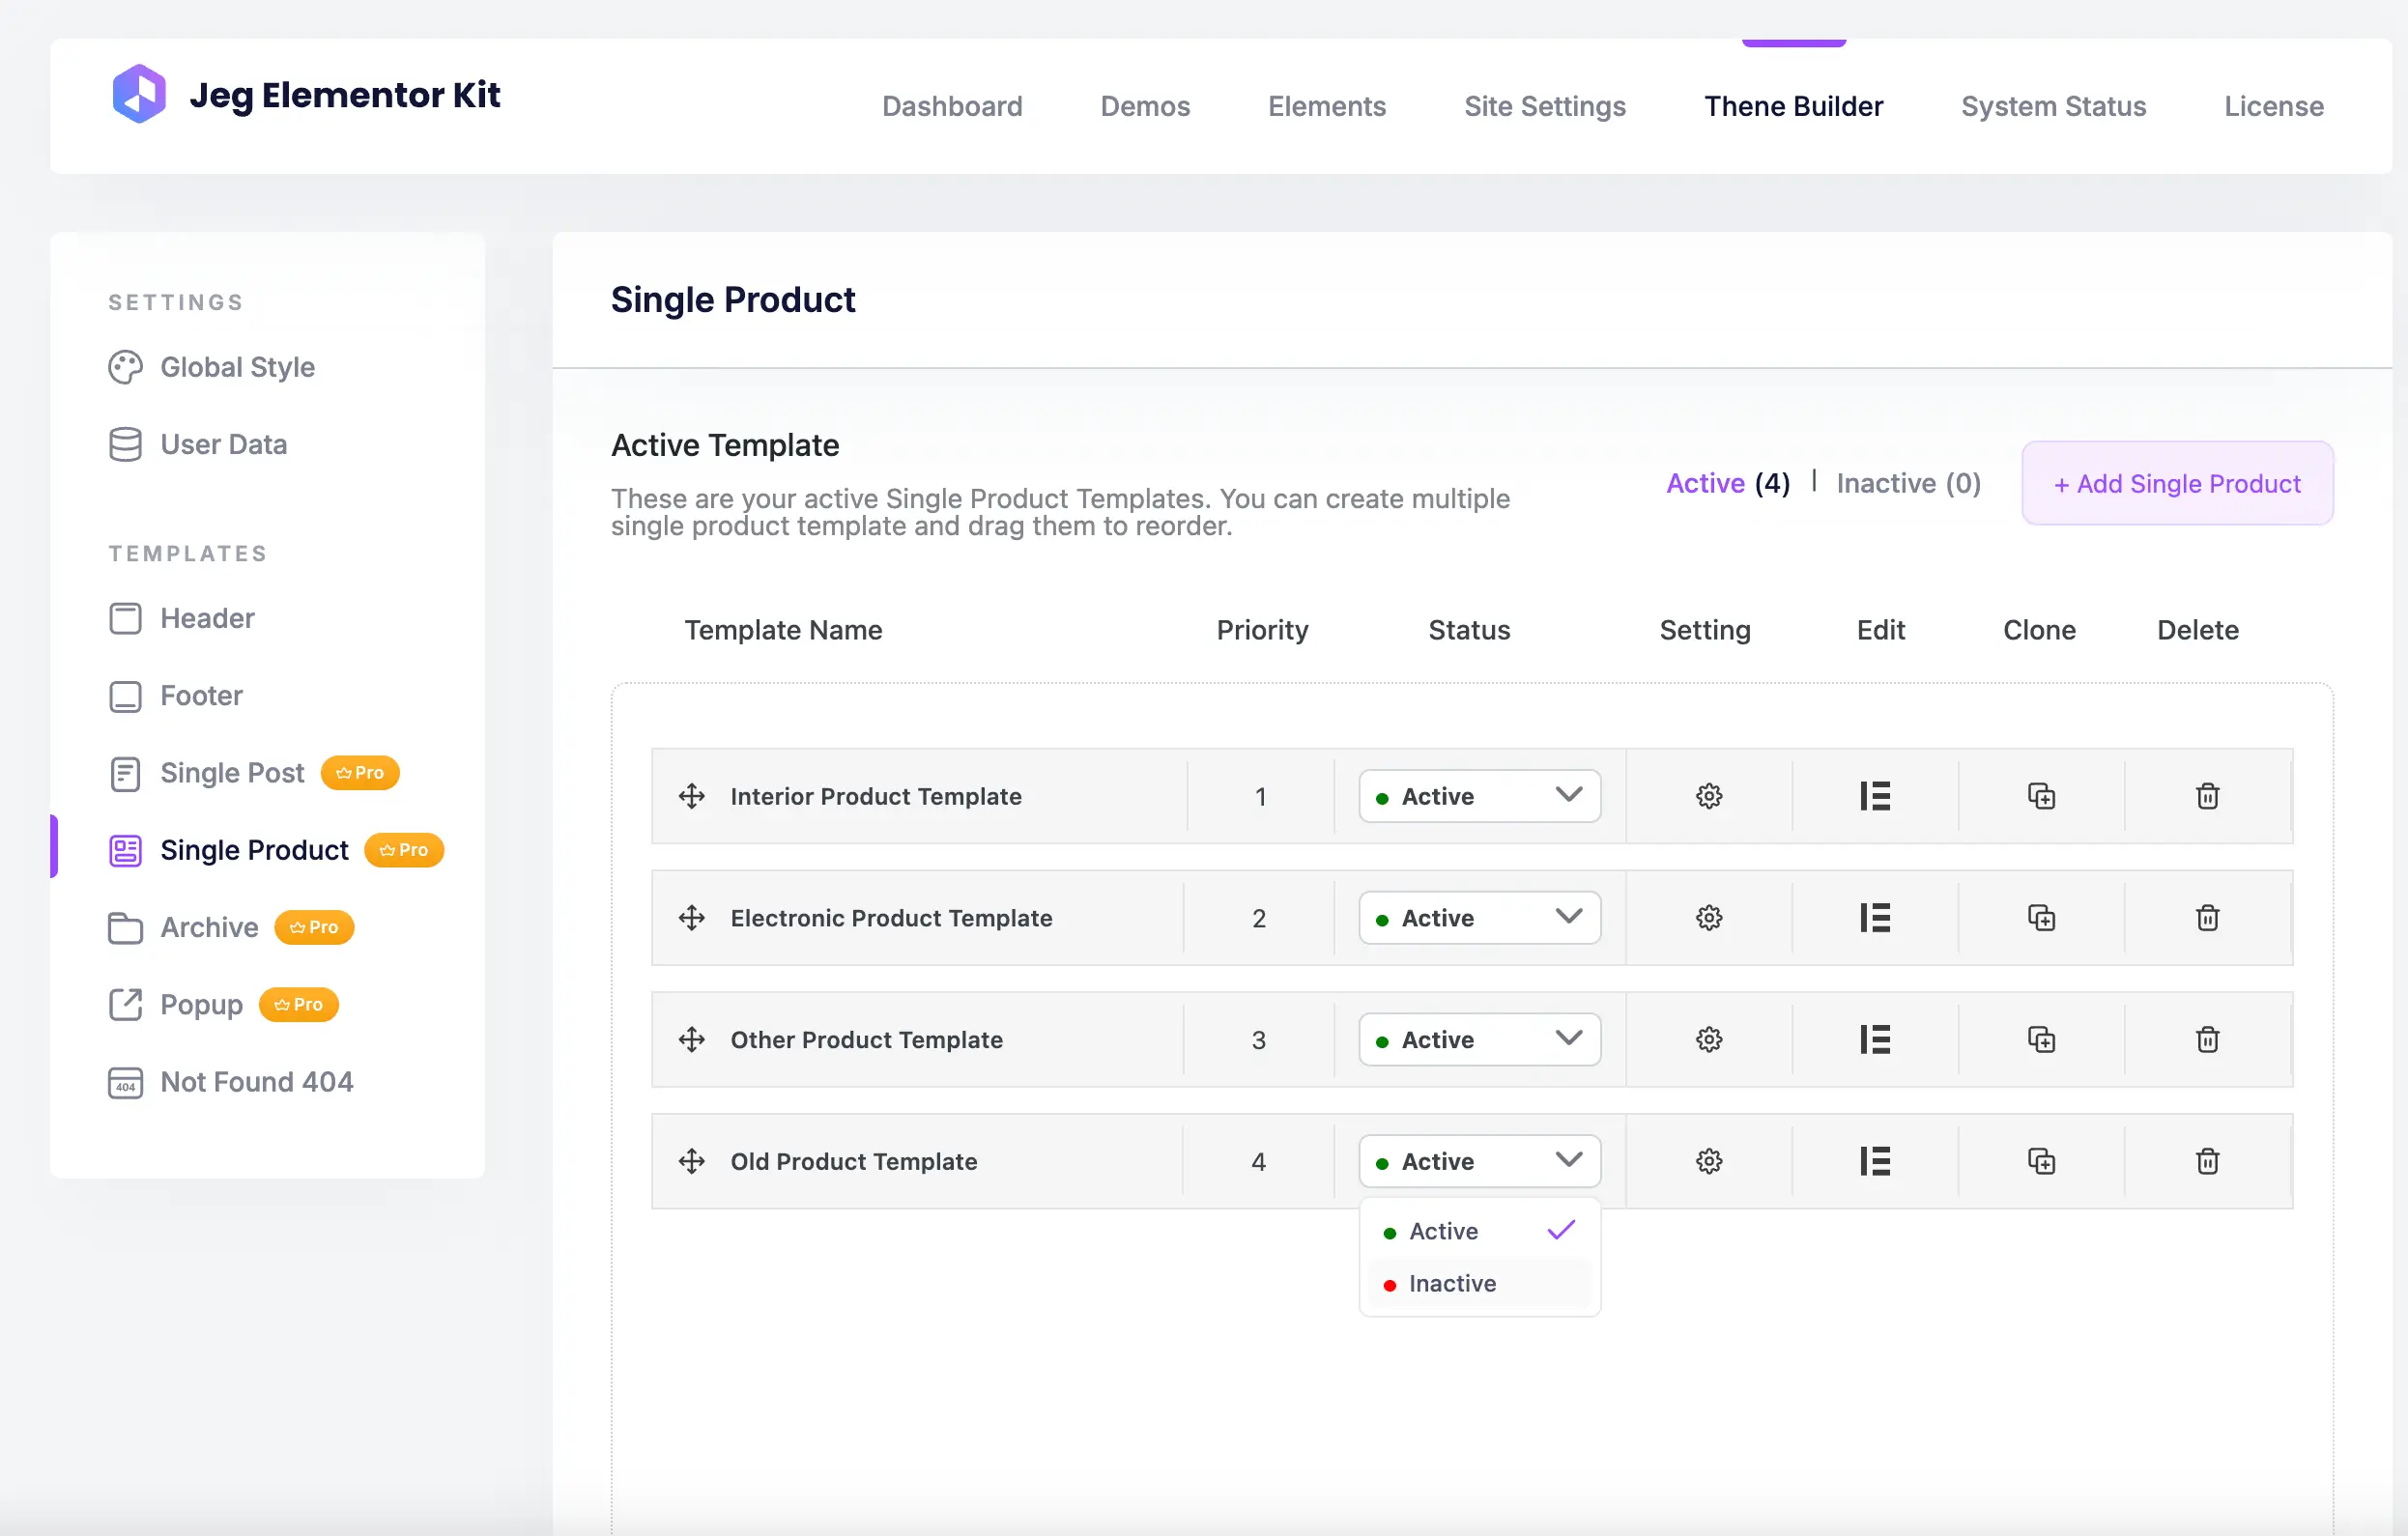
Based on the image above, you can see some important parts of the Single Product template dashboard such as:
- Active
You can click the Active button at the top of the Single Product Template page to display the list of Single Product templates currently active on your template. - Inactive
You can click the Inactive button at the top of the Single Product Template page to display the list of Single Product Templates currently inactive on your template.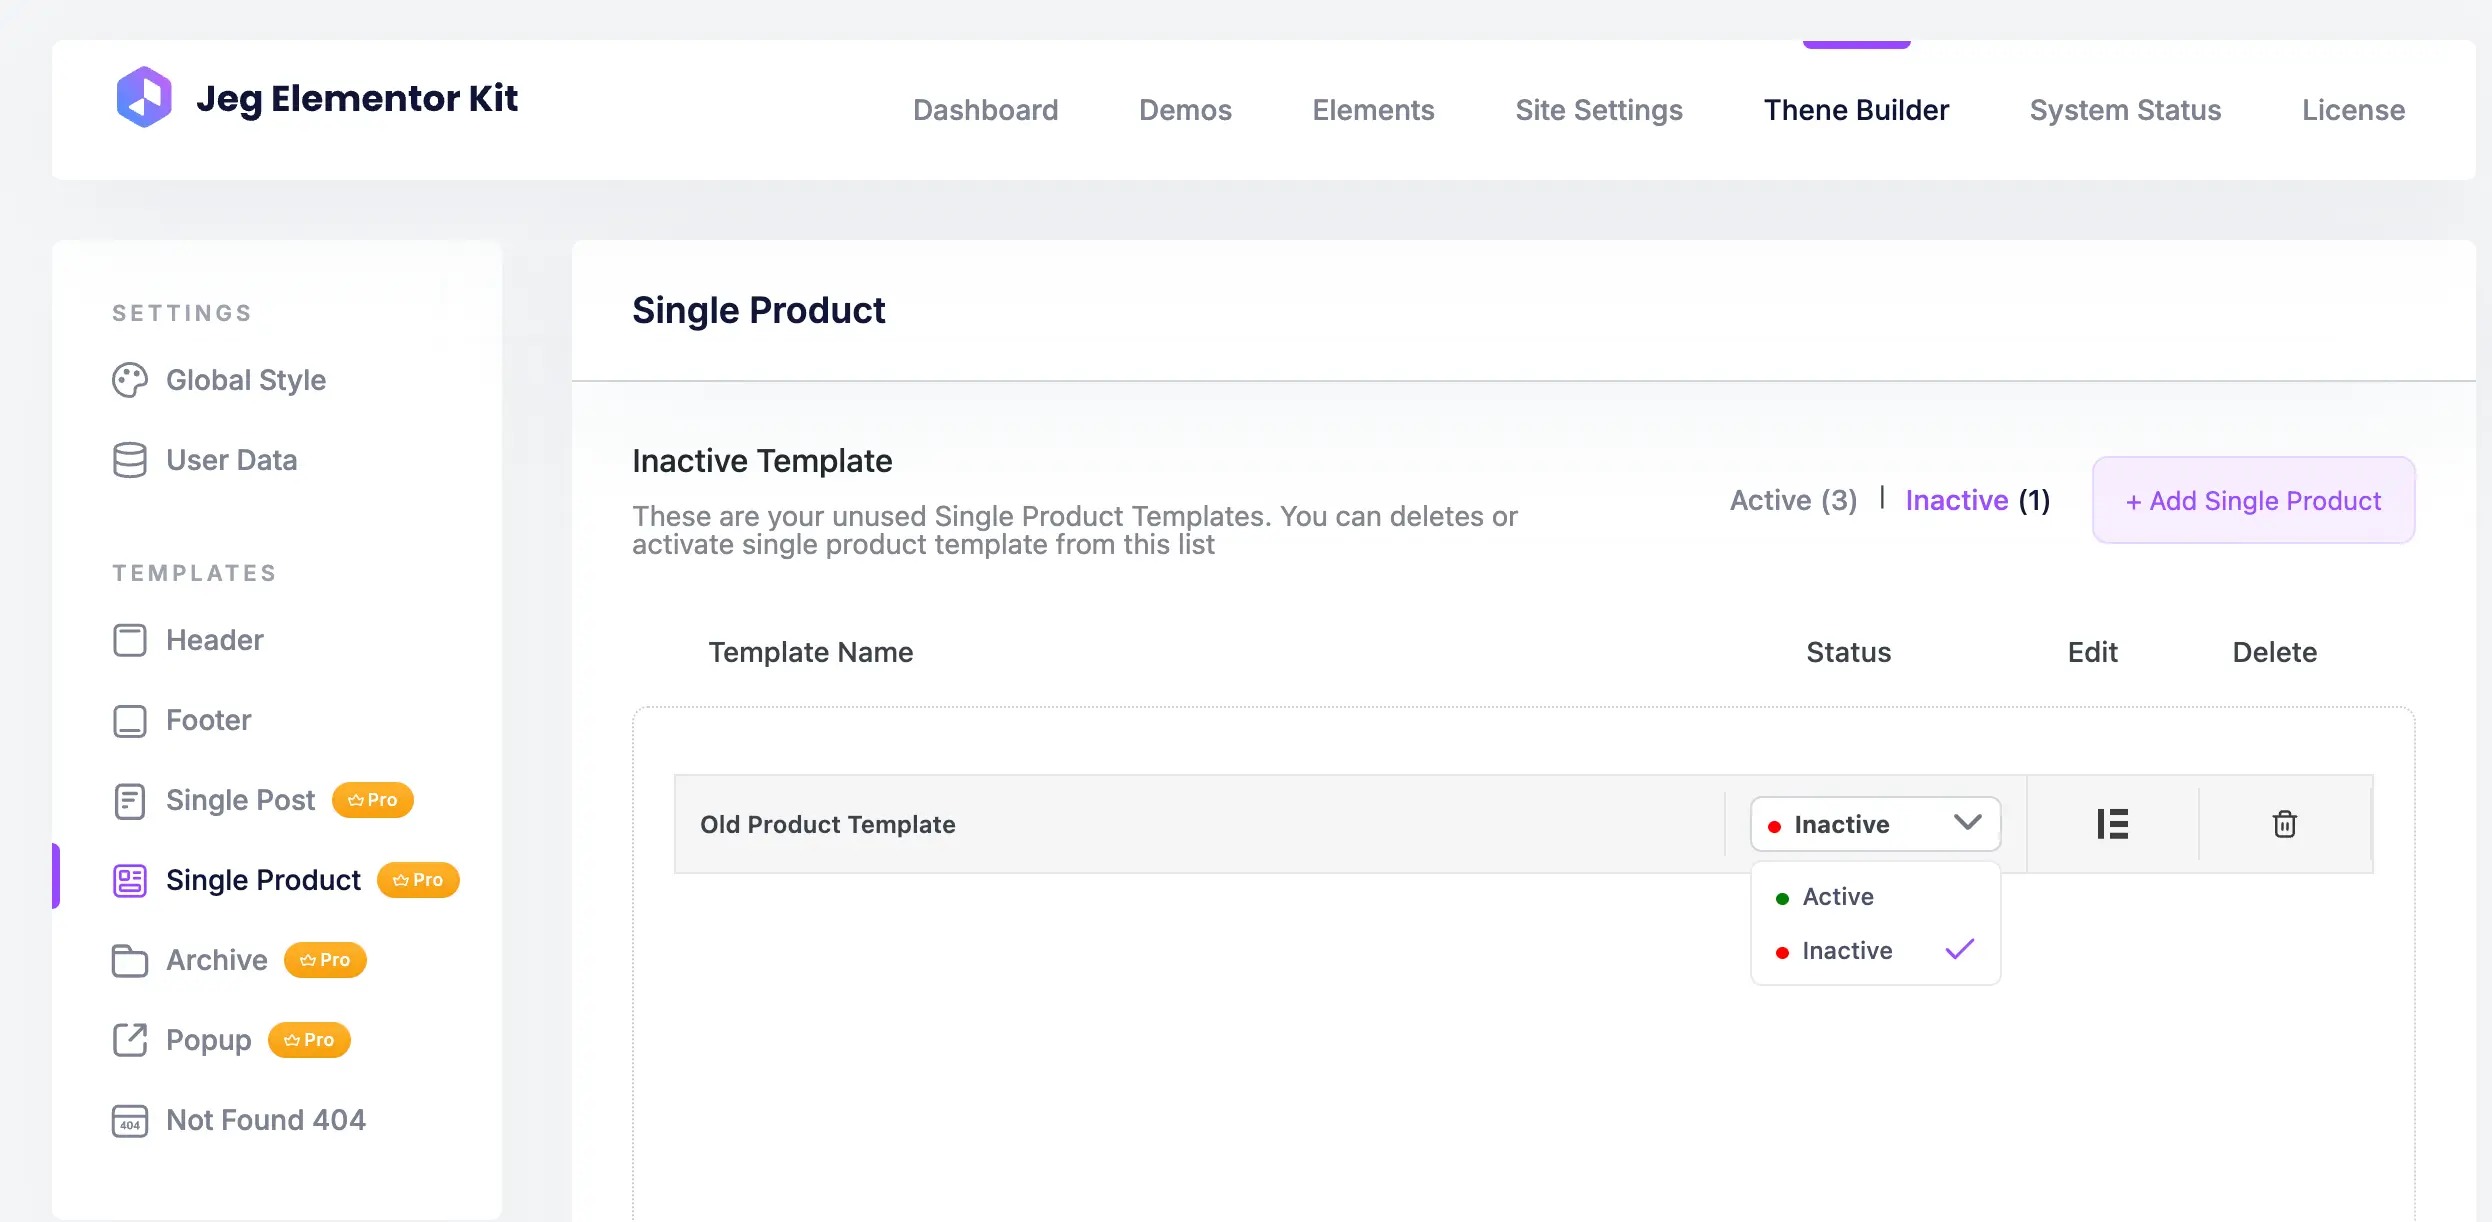
- Template name
The template name column is where you can see the name on each Single Product template. - Status
The status column is where you can see the Single Product Template status, and you can change the status of the template (Active / Inactive). - Priority
The priority column is where you can see the Single Product Template priority which will be looped in order upon site rendering. - Setting
You can click the Settings button to edit the Template Name and Template Conditions - Edit
The edit column is where you can edit the Single Product Template by clicking the pencil icon with Elementor. - Clone
The clone column is where you can duplicate the Single Product Template by clicking the clone icon. - Delete
The delete column is where you can remove the Single Product Template by clicking the trash icon.